This module will provide you with step-by-step instructions on how to file a Notice of Appearance and Request for Notice.
STEP 1 Click the Bankruptcy hyperlink on the CM/ECF Main Menu. (See Figure 1.)
![]()
Figure 1
STEP 2 The Bankruptcy Events Menu is displayed. (See Figure 2.)
Figure 2

- Click on the Miscellaneous hyperlink.
STEP 3 The Case Number screen is displayed. (See Figure 3.)
Figure 3
NOTE: If you have already accessed a case in this session, the number for the last case accessed will be displayed. Leave this number if it is the correct case, or enter the correct case number (YY-NNNNN) - be sure to include the hyphen.

- Click on the [Next] button to continue.
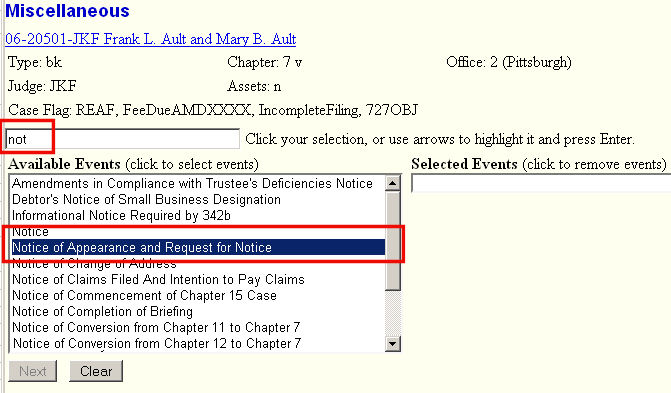
STEP 4 The Event Selection screen is displayed (See Figure 4.)
|
|
|
STEP 5 Indicate whether a Joint Filing. (See Figure 5.)
|
|
If not filing with another attorney, leave the box unchecked,
If filing jointly with another attorney of record in the case, click in the check-box provided and the next screen would list current attorneys on the case allowing you to select the one whom is the joint filer. |
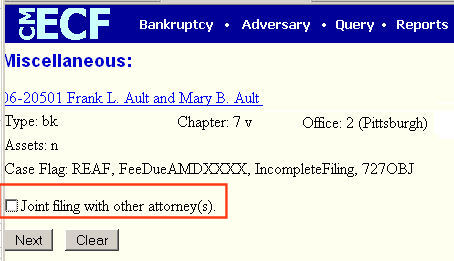
- Click on the [Next] button to continue
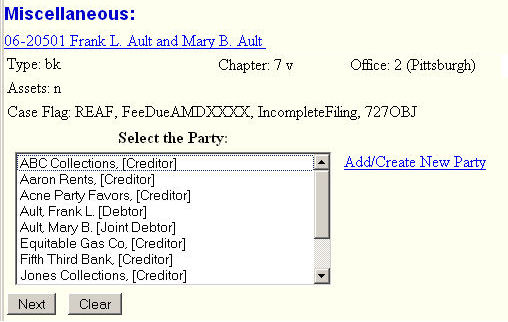
STEP 6 The Select the Party screen in this example does not include our filer, American Express. (See Figure 6a.)
|
|
|
Here we see the Select the Party list showing the current parties in the case.
NOTE: Parties are displayed in the list are displayed because some pleading has been filed on their behalf in this case. Proof of Claims and Mailing Matrix parties are not displayed in this list unless they file some other pleading in the case. |
-
Since the party we represent is not in the list, we would activate the Add/Create New Party process.
Note: Be sure this new party's Role was set to "Creditor (cr:cr)".
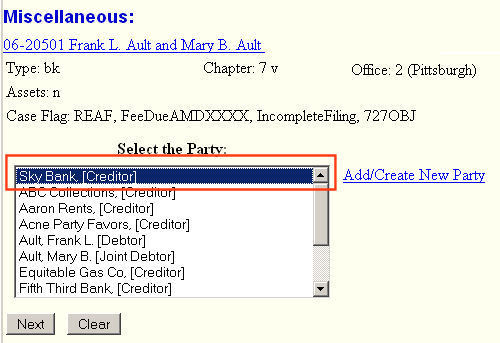
- Upon completing the process, we have added the party to the Party list. (See Figure 6b)
Figure 6bNOTE: The party that was just added to the case is now displayed at the top of the Party list and not sorted in the list alphabetically. This is only temporary so right after an add to the list. The next time the Party list for this case is displayed, that party will be listed in proper alphabetical sequence.
Click on the Next button to continue
STEP 7 The Attorney/Party association screen is displayed. (See Figure 7.)
|
|
It is very important to realize that this screen is displayed not because of any particular event or pleading that is being filed, but instead is the result of indicating, on the previous screen, that you were filing on behalf of a party that you had never represented before in this case. For all practical purposes, you will always check any box(es) presented on this screen. |
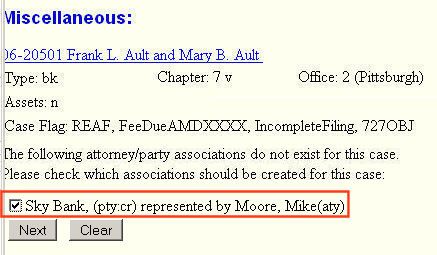
- Since we do want to establish the association, click in the box to establish the association as GMAC's attorney.
- Click the Next button to continue.
STEP 8 The Select the pdf Document/Browse screen is displayed. (See Figure 8.)
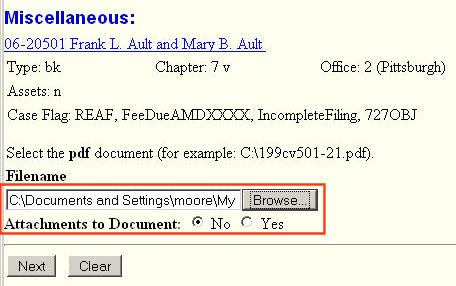
Figure 8
- See the Browse Process for details on selecting the pdf file.
- Once the pdf file selected, click on the [Next] button to continue.
STEP 9 The Modify Docket Text screen will be displayed. (See Figure 9.)
Figure 9
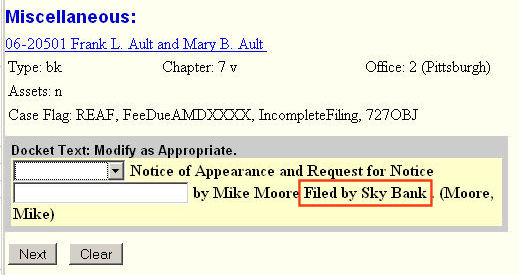
- If the information displayed is correct, click on the [Next] button to continue.
NOTE: Read this screen carefully. I anything is wrong or missing, use the Browser's BACK button to return to any previous screen to make the correction(s). Resubmit that screen and then all screens after that one.
STEP 10 The Final Docket Text screen will be displayed. (See Figure 10.)
Figure 10
NOTE: Read this screen carefully. I anything is wrong or missing, use the Browser's BACK button to return to any previous screen to make the correction(s). Resubmit that screen and then all screens after that one.
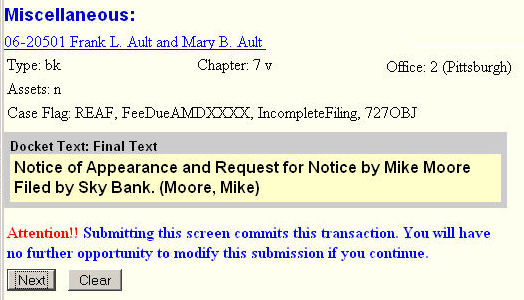
- Click on the [Next] button to continue.
STEP 11 The Notice of Electronic Filing (NEF) screen is displayed. (See Figure 11.)
Figure 11
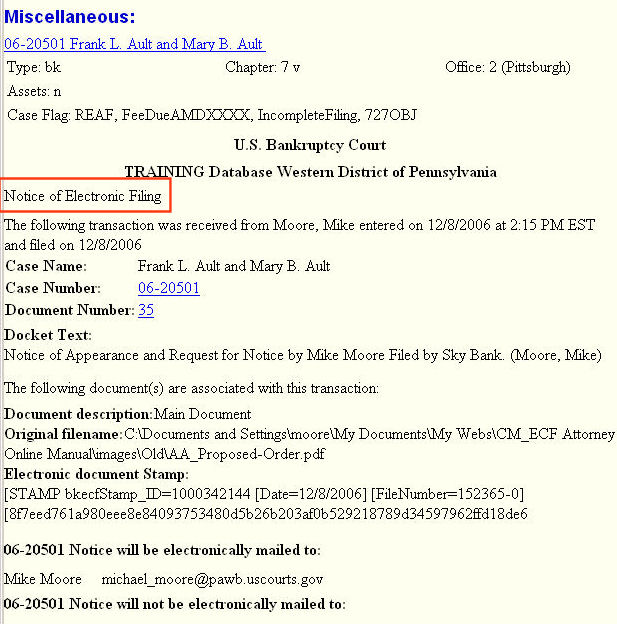
- Clicking on the case number hyperlink on the NEF will present the docket report for this case. Attorney users will be presented with a PACER login screen to access these features.
- Clicking on the document number hyperlink will display the PDF image of the document just filed. Attorney users will be presented with a PACER login screen to access these features.
- To print a copy of this electronic receipt click the browser's [Print] icon.
Return to the Topics in Alphabetical Order page.