The following is a detailed discussion of the steps to use in filing an Amended Ch. 13 Plan.
STEP 1 Click on the Bankruptcy hyperlink on the CM/ECF Main Menu. (See Figure 1.)
![]()
Figure 1.
STEP 2 The Bankruptcy Events screen displays. (See Figure 2.)
Figure 2.
- Click on the Plan hyperlink.
STEP 3 The Case Number prompt screen displays. (See Figure 3.)
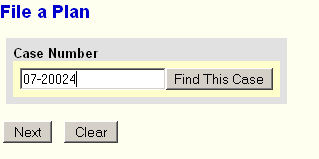
Figure 3.
-
If a case number displays, verify that it is the correct number.
- If no case number displays, enter the case number in YY-NNNNN format.
- Click the [Next] button to continue.
STEP 4 The Event Selection screen displays. (See Figure 4.)
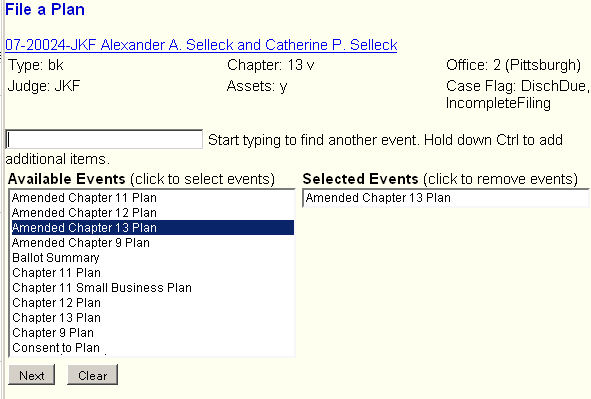
Figure 4.
- Scroll down to the Amended Chapter 13 entry and click on it.
- Click on the [Next] button to continue.
STEP 5 The Joint filing with other attorney(s) screen displays. (See Figure 5.)
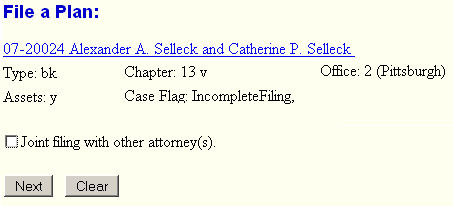
Figure 5.
-
If not joint filing, leave box unchecked.
- Click on the [Next] button to continue.
STEP 6 The Select the Party screen displays. (See Figure 6.)
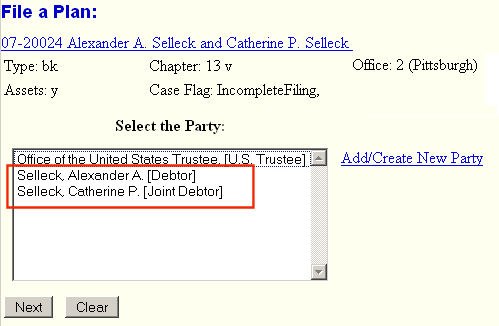
Figure 6.
-
Click on the debtor's name, or use your Ctrl-key to select both debtors in a joint case.
- Click on the [Next] button to continue.
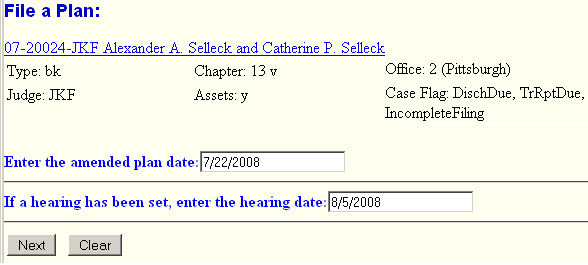
STEP 7 The Enter Plan and Hearing Dates screen displays. (See Figure 7.)
Figure 7.
- Enter the amended plan date and if appropriate, the hearing date.
- Click on the Next button to continue.
STEP 8 The Is the plan confirmed? screen displays. (See Figure 8.)
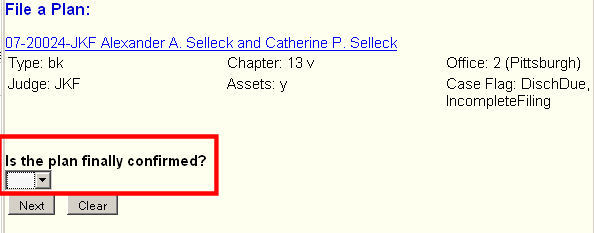
Figure 8.
-
Answer "yes" or "no" as appropriate .
- Click on the Next button to continue.
STEP 9 The Appropriate Upload File Explanation screen displays.
(See Figures 9a and 9b.)
Depending upon whether you answered "yes" or "no" on the previous screen, the system will display instructions as to what documents need be uploaded depending upon which you answered.
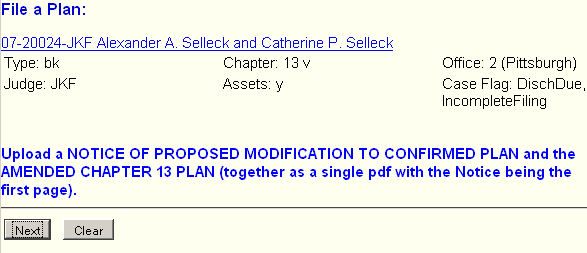 Figure 9a - When the plan WAS previously confirmed . |
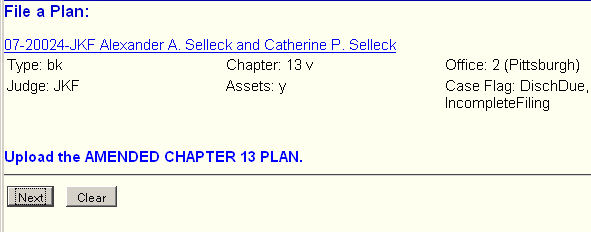 Figure 9b - When the plan WAS NOT previously confirmed. |
STEP 10 The Select the pdf file screen displays.
(See Figures 10a and 10b.)
Figure 10a.

- Use the Browse button to identify the pdf file containing the amended plan.
- Click on the [Next] button to continue.
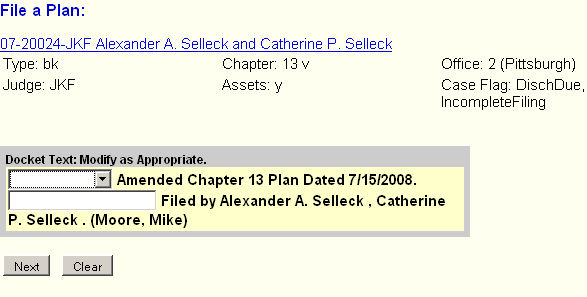
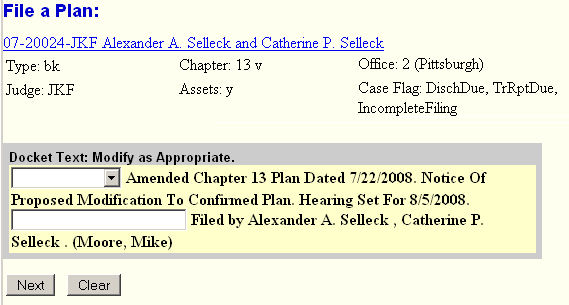
STEP 11 The Modify Docket Text screen displays.
(See Figures 11a and 11b.)
(Figure 11a) When Plan was not previously confirmed.
(Figure 11b) When Plan was previously confirmed.
-
Check the docket entry as displayed for correctness and completeness.
-
Use your Browser's BACK button to return to any screen to correct or add necessary entries.
- Click on the Next button to continue.
STEP 12 The Final Docket Text screen displays. (See Figure 12.)
Figure 12.
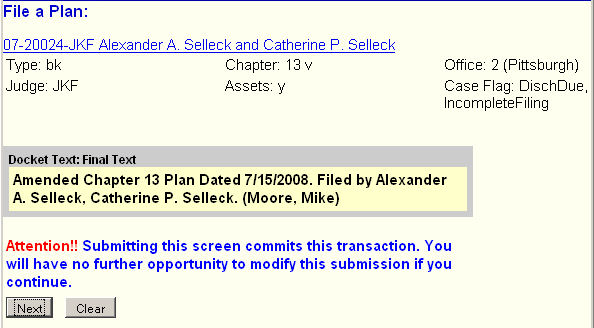
-
For the last time, check the docket entry as displayed for correctness and completeness.
-
Use your Browser's BACK button to return to any screen to correct or add necessary entries.
- Click on the Next button to continue.
STEP 13 The Notice of Electronic Filing screen is displayed. (See Figure 13.)
Figure 13.
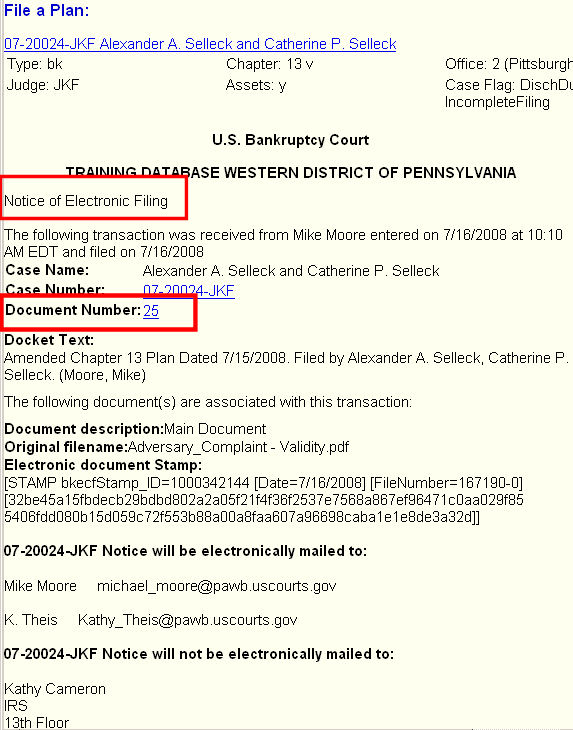
- Clicking on the case number hyperlink on the Notice of Electronic Filing will present the docket report for this case.
- Clicking on the document number hyperlink will present the PDF image of the application just filed.
- You must enter your PACER login and password to view any documents or reports or perform any queries.
Return to the Topics in Alphabetical Order page.