This module covers filing a motion to attach wages of a debtor.
STEP 1 Click the Bankruptcy hyperlink on the CM/ECF Main Menu.
(See Figure 1.)
Figure 1STEP 2 The Bankruptcy Events Menu is displayed. (See Figure 2.)
Figure 2
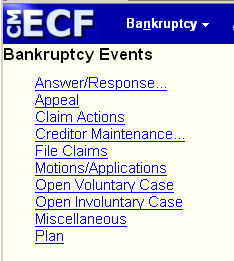
- Click on the Motions/Applications hyperlink.
STEP 3 The Case Number Prompt is displayed. (See Figure 3.)
Figure 3.
NOTE: If you have already accessed a case in this session, the number of the last case accessed will be displayed. Leave this number if it is the correct case for this filing, or enter the correct case number using the format of: YY-NNNNN (include the hyphen).
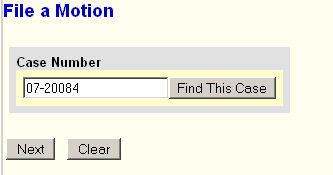
- Enter the case number, or insure number displayed is correct.
- Click on the [Next] button to continue.
STEP 4 The Event List is displayed. (See Figure 4.)
Figure 4.
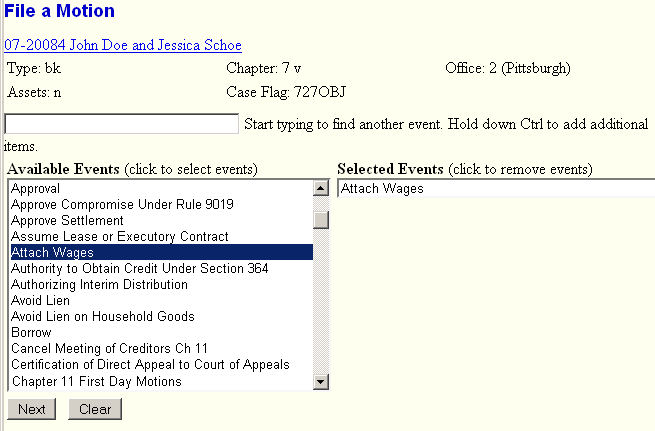
- Scroll to and click on the Attach Wages event.
- Click on the [Next] button to continue.
STEP 5 The Joint filing with other attorney(s) screen is displayed.
(See Figure 5.)
Figure 5.
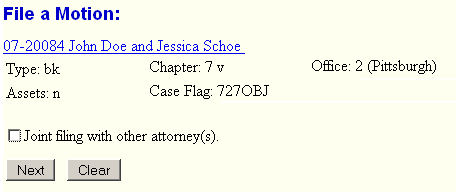
- If not filing with another attorney, click on the [Next] button to continue.
-
If filing jointly, click in the check-box provided, then click on the [Next] button
to view a list of existing attorneys on the case and select the other attorney from that list.
STEP 6 The Select the Party screen is displayed. (See Figure 6.)
Figure 6.
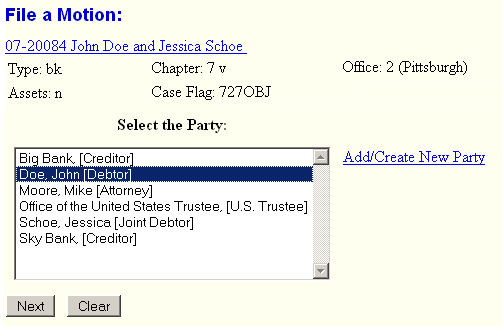
- Select the debtor as the party whose wages are to be attached.
- Click on the [Next] button to continue.
STEP 7 The Select the pdf document screen is displayed. (See Figure 7.)
Figure 7.
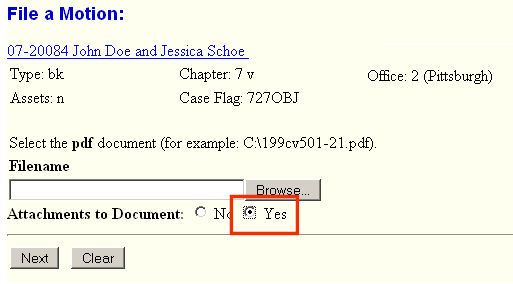
- Here you would identify the pdf file containing the Attach Wages motion.
-
Click on the [Browse] button to identify that PDF file.
(See the Browse_Process for details on this action.) -
Change Attachments to Document to "Yes" and proceed to the
Attachment Process to identify the pdf file containing the proposed order. - Click on the [Next] button to continue.
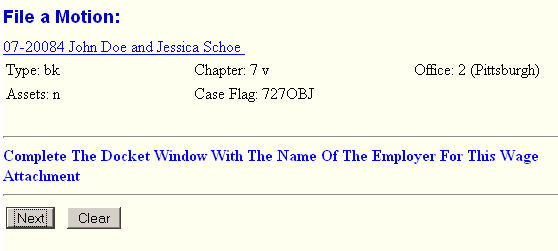
STEP 8 The "... Name Of The Employer..." screen is displayed.
(See Figure 8.)
Figure 8.This screen reminds one to fill in the blank on the next screen (Modify Docket Text)
with the name of the employer who will attach and forward the wages.
STEP 9 The Modify Docket Text screen will be displayed. (See Figure 9.)
Figure 9.

- Complete this screen with the creditor’s name - PNC Bank in this example.
- Select a prefix if appropriate.
- Click on the [Next] button to continue.
STEP 10 The Final Docket Text screen will be displayed. (See Figure 10.)
Figure 10.
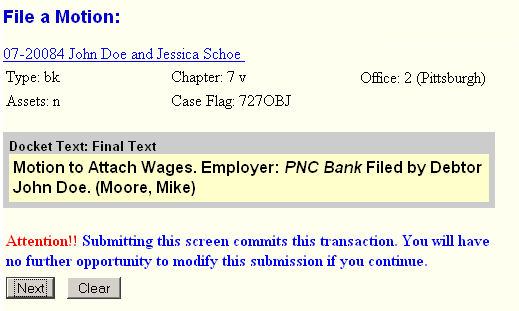
-
Verify that the proposed docket text is correct and complete. If not, use your Back
button to make corrections or additions. - Click on the[Next] button to submit this action/filing.
STEP 11 The Notice Of Electronic Filing (NEF) screen is displayed.
(See Figure 11.)
Figure 11.
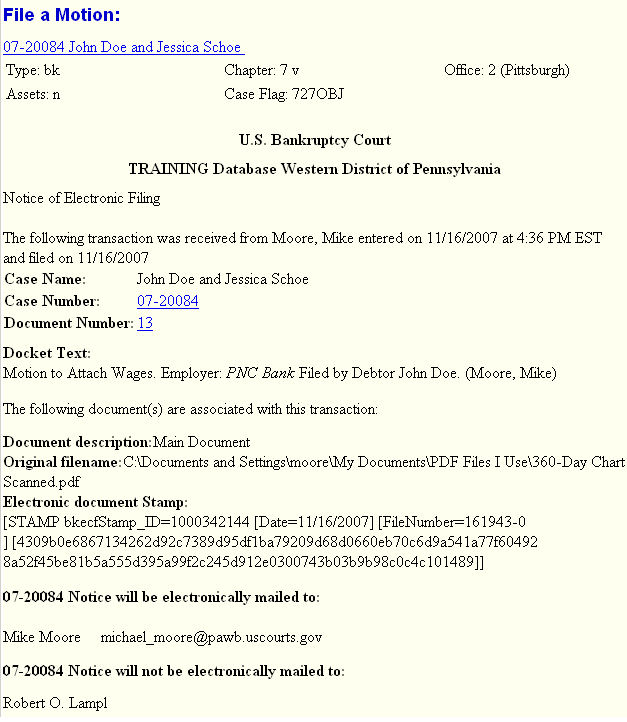
- Print a copy of this for your records if you wish.
- Use the two sections at the end to see who gets automatic electronic notice and who would, if they need to be served, would be served by paper.
Return to the Topics in Alphabetical Order page.