This lesson describes the Cases Report and how it can be generated. The Cases report presents information from the court’s database with a variety of selection criteria for case management and tracking.
STEP 1 Click on the Reports hyperlink on the CM/ECF Main Menu Bar. (See Figure 1.)
![]()
Figure 1
STEP 2 The REPORTS menu displays. (See Figure 2.)
Figure 2
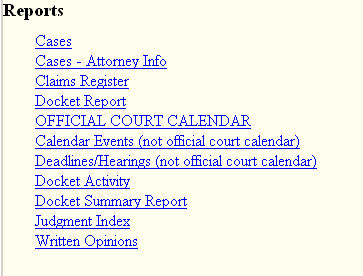
- Click on the Cases hyperlink.
STEP 3 If you are not logged-in to PACER, the PACER LOGIN screen displays (See Figure 3).
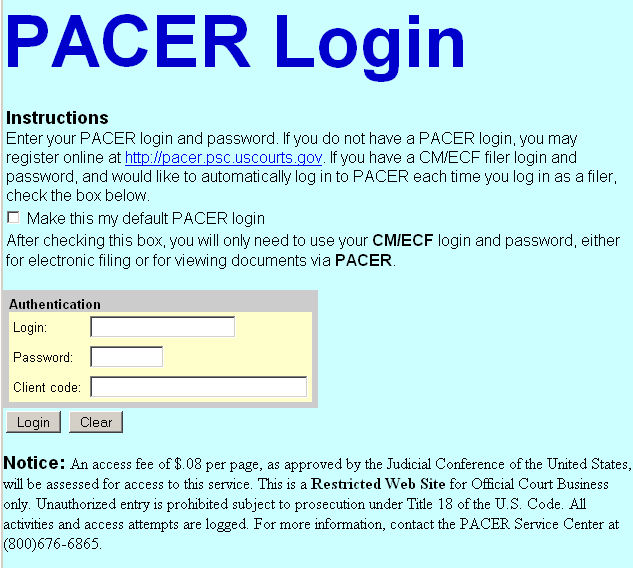
Figure 3
NOTE: Note the title of this screen is PACER Login, and NOT ECF/PACER Login (which is the CM/ECF login).
NOTE: The Public Access to Court Electronic Records (PACER) program provides access to CM/ECF users. Logins and passwords can be issued by registration with the PACER Service Center. Current PACER logins and passwords will be accepted by the CM/ECF system. Note the information that is provided to the user on the screen above.
-
Enter your PACER assigned Login and Password (These fields are case sensitive).
-
Enter the Client Code. This optional field is used for billing by PACER users. The data will be included in PACER billing reports.
NOTE: If you click in the Make this my default PACER login box, your login will automatically appear each time you attempt to access PACER. If you click on the [Reset] button, all entries will be cleared. To change the client code within a session, go to Change Client Code under the Utilities Menu.
- Click on the [Login] button.
STEP 4 The Cases Report parameters screen displays. (See Figure 4.)
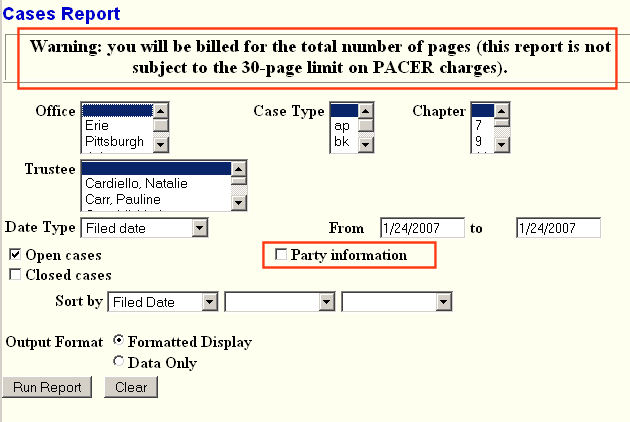
Figure 4
The following fields are available for selecting/entering criteria for generating the Cases Report:
|
Note:
|
As the message clearly indicates, that this report is not subject to the 30-page limit on PACERs charges and if you run this report, you will be charged for all pages printed! |
-
Office – Allows you to specify the divisional office activity you want cases to be included on the report. The default is all offices.
-
Case Type – The choices are ap - Adversary Proceedings or bk - Bankruptcy The default is all cases.
-
Chapter – Cases can be selected by Chapter 7, 9, 11, 12, 13, or 15. The default is all chapters.
-
Date Type – Allows you to specify which date is used when generating the report. The choices are Filed, Entered, Discharged, Dismissed, Closed, or Converted. The default is Filed Date.
-
From/to – Enter a beginning and/or ending date. The default is the current date. For one day’s activity, the dates should be the same in both fields. Enter dates by MM/DD/YY or MM/DD/YYYY.
-
Open cases – You can restrict activity by open or closed cases. A check mark is defaulted in this box.
-
Closed cases – The option to include or exclude closed cases is available. The default in this box is no Closed cases.
-
Party information – Placing a check mark in this box will allow you to include additional party information along with each party(s) name (i.e., address, SSN, and TAX ID).
-
Sort by – Allows you to select up to three sorting order sequences for the report. The choices are Filed Date, Entered Date, Case Number, Case Type, or Office. The default is Filed Date.
- The [Clear] button will reset all fields to their default values.
- After entering your criteria, click on the [Run Report] button.
STEP 5 The Cases Report is displayed. (See Figure 5a - Report without Party Option.)
NOTE: All reports can be printed by clicking on the browser’s Print button.
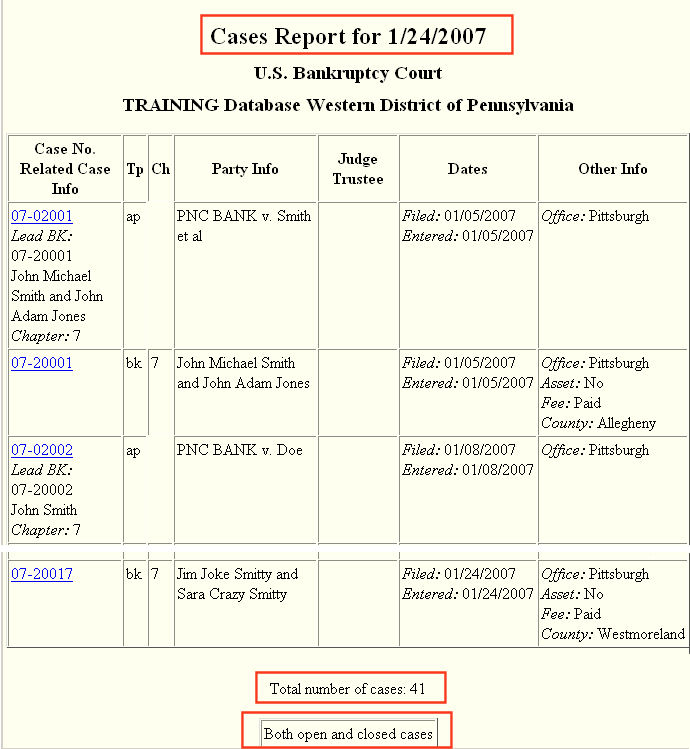
Figure 5a - Report without Party Option
- The following information will be displayed on the Cases Report without the Party Option selected:
-
Case No./Related Case Info – Displays the assigned case number, chapter, and debtor. Clicking on the case number hyperlink will allow you to generate a Docket Report.
-
If the Case Type is an Adversary Proceeding (ap), the “Lead” case number appears beneath the adversary case number hyperlink.
-
Tp (Type Proceeding) – Displays either ap or bk.
-
Ch (Chapter) – Displays either 7, 9, 11, 12, 13, or 304.
-
Party Info – Displays the debtor (and joint debtor) information for bankruptcy cases. Plaintiff information will also be displayed for ap cases. An additional row will be displayed for some lead bankruptcy case information.
-
Judge/Trustee – If there is a trustee on a bankruptcy case, the name appears directly below the judge’s name.
-
Dates – Date information will include the dates the proceedings were either Filed, Converted, Dismissed, Discharged, Closed, or Entered.
- Other Info – Other information may include the divisional office, asset designation, and fee status.
The following information is the Cases Report with the Party Information Option selected: (See Figure 5b.)
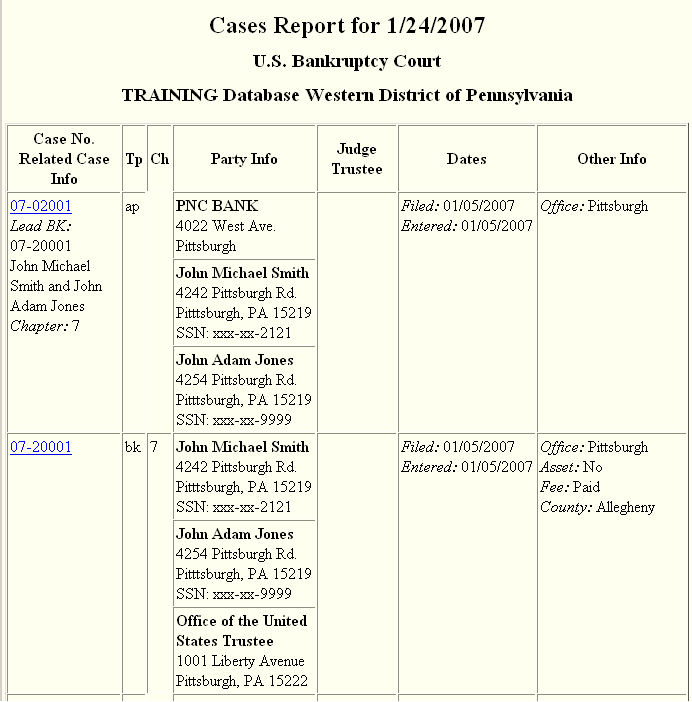
Figure 5b - Report with Party Option Selected
- All the other parties in the case were added along with all the addresses.
- Clicking on any of the Case Number hyperlinks will display the Docket Sheet parameter screen.
NOTE: Refer to the Docket Report module in this Online Manual for more information on the Docket Report.
Return to the Topics in Alphabetical Order page.