This module will provide you with step-by-step instructions on how to file a Certificate of Service.
STEP 1 Click the Bankruptcy hyperlink on the CM/ECF Main Menu. (See Figure 1.)
![]()
Figure 1
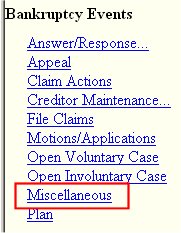
STEP 2 The BANKRUPTCY EVENTS screen is displayed. (See Figure 2.)
Figure 2.
- Click on the Miscellaneous hyperlink.
STEP 3 The CASE NUMBER screen is displayed. (See Figure 3.)
Figure 3.NOTE: If you have already accessed a case in this session, the number of the last case accessed will be displayed. Leave this number if it is the correct case for this application, or enter the correct case number (YY-NNNNN), to include the hyphen.

-
Enter, or verify, the correct case number.
- Click on the [Next] button to continue.
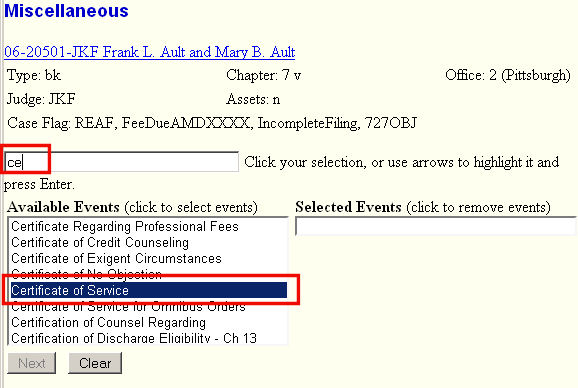
STEP 4 The Event List screen is displayed (See Figure 4.)
Figure 4.
-
First, ensure you are on the correct case.
- Type "ce" into the event search box.
- Scroll to and click on Certificate of Service entry in the Available Events box to get that entry displayed in the Selected Events box.
- Click on the [Next] button to continue.
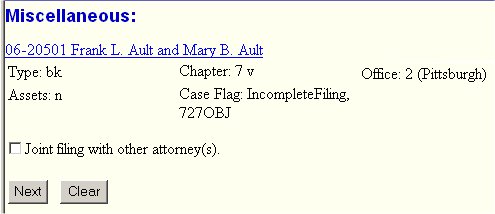
STEP 5 The Joint Filing screen is displayed. (See Figure 5.)
Figure 5.NOTE: If filing jointly, you will be provided with a screen listing the attorney(s) on the case.
-
Normally this box will be left unchecked.
-
If box checked, next screen will display a list of attorneys on the case to select from.
- Click on the [Next] button to continue.
STEP 6 The Select the Party screen is displayed. (See Figure 6.)
Figure 6.
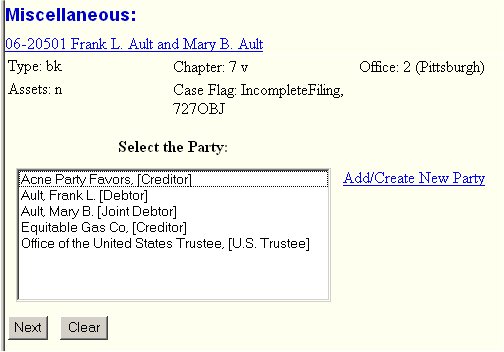
- Select the party you represent from the Party List.
Note: As in other lists, you can utilize the first-letter search feature.
-
Your party must be on the list since you have already filed the pleading for which this Certificate of Service references. If you client not on list, you are on the wrong case!.
-
Click on the [Next] button to continue.
STEP 7 The Select the pdf Document screen is displayed. (See Figure 7.)
Figure 7.
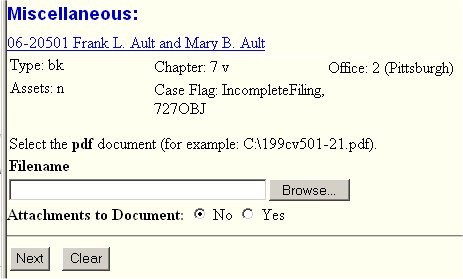
-
See the Browse Process for details on identifying the pdf file containing your Certificate of Service.
-
Leave the Attachments to Document at "No" since there is no other pdf file.
- Click on the [Next] button to continue.
STEP 8 The Enter Hearing Date and Filter Docket screen is displayed. (See Figure 8)
Figure 8
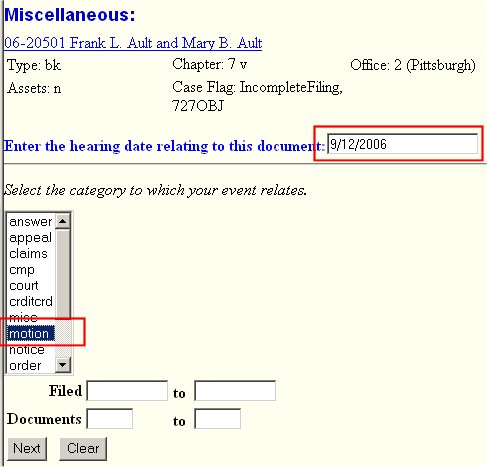
-
Complete the Enter the hearing date field.
- Use the Select the category section to filter-in the section of the docket for this case that should contain the event that this Certificate of Service references.
See the Select the Category Process for details on this feature.
For this Certificate of Service:
- Select court to cover the motion,
- Select order to cover the order served,
- Hold the Ctrl key down to select two categories.
- Click on the [Next] button to continue.
STEP 9 Now to link the Certificate of Service to the related event - check the box next to the Application to Employ (See Figure 9)
Figure 9.
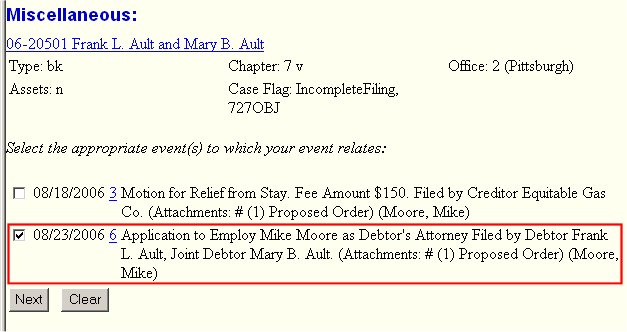
-
Click in the box next to the related event - here it is the Application to Employ.
- Click on the [Next] button to continue.
STEP 10 The Modify Docket Text screen is displayed. (See Figure 10.)
Figure 10
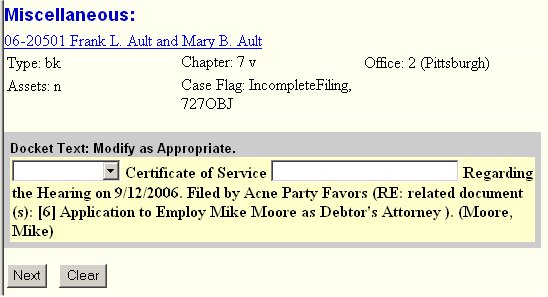
-
Select a prefix if appropriate - not in this example.
-
Since this example has no attachment, there is no reference to such.
- Click on the [Next] button to continue.
STEP 11 The Final Docket Text screen will be displayed. (See Figure 11.)
Figure 11
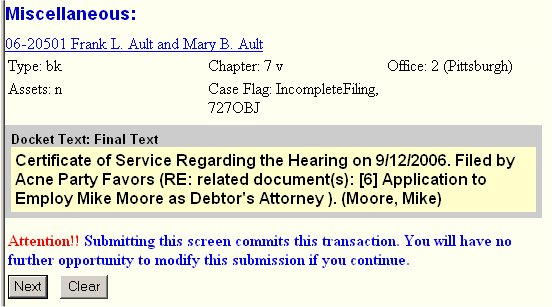
-
Check docket text - can still to go back to previous screen(s) and make corrections.
- Click on the [Next] button to continue.
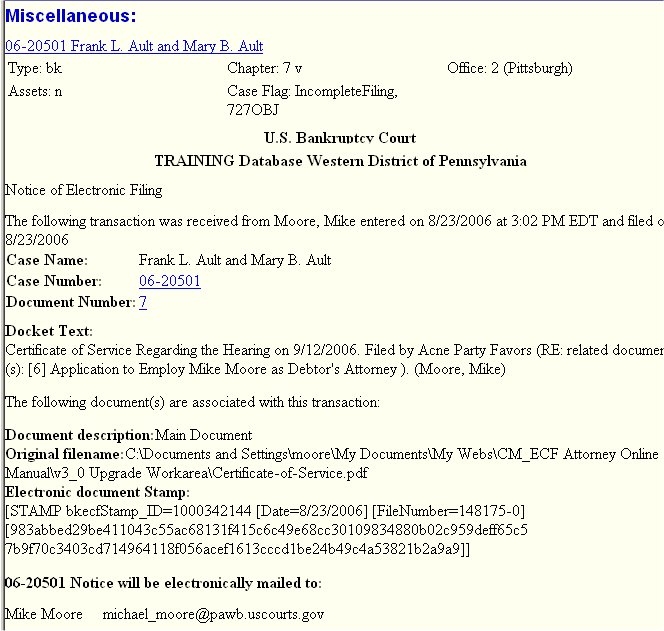
STEP 12 The Notice of Electronic Filing screen is displayed. (See Figure 12.)
Figure 12
-
Clicking on the case number hyperlink will present the docket report for this case. Attorney users will be presented with a PACER login screen to access these features.
-
Clicking on the document number hyperlink will display the PDF image of the document just filed. Attorney users will be presented with a PACER login screen to access these features.
- To print a copy of this electronic receipt click the browser [Print] icon.
NOTE: It is a good idea to print all NEFs for internal tracking of all filings.
Return to the Topics in Alphabetical Order page.