All CM/ECF users will have an account with a login and password. Attorneys and Limited Filing Users (LFU) are required to keep their information current through this process.
NOTE: The first thing a user MUST do upon receipt of their login is to update their account information as described below.
This module provides functionality for attorneys to setup and/or modify:
- user name, address and other party and attorney data,
- E-mail information, (Not Applicable to LFUs)
- electronic noticing settings, (Not Applicable to LFUs)
- user login and passwords.
NOTE: LFU users do not get email notices of docketed events!
NOTE: To complete updating of your account, you must click-on the Submit button twice - once on the "Maintain User Account" screen and again on the "Searching for existing Attorney Records" or the "Case specific fields were not altered" screen (whichever was triggered by which field(s) you changed).
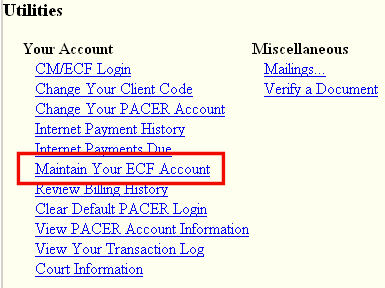
STEP 1 Click on the Utilities hyperlink on the CM/ECF Main Menu bar. (See Figure 1.)
Figure 1.
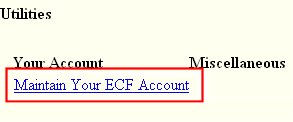
STEP 2 Click on the Maintain Your ECF Account hyperlink in the Your Account category.
(See Figure 2A for attorney filers.) (See Figure 2B for limited filing users.)
Figure 2A.
Figure 2B.
NOTE: If there is no Maintain Your ECF Account entry, then you have logged-into PACER directly without first logging-into CM/ECF. Be sure the login screen is titled as "CM/ECF Filer or PACER Login" to login to CM/ECF.
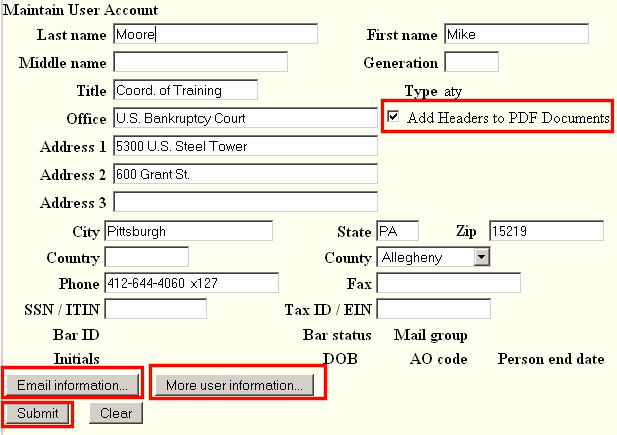
STEP 3 The Maintain User Account Main Screen will appear. (See Figure 3.)
Figure 3
- This screen contains your personal information. If any of this information changes over time, it is the responsibility of the attorney to login into CM/ECF and update this account information.
Note: Do not enter SSN / ITIN or Tax Id / EIN values!
- Check the Add Headers to PDF Documents if you wish.
"A new checkbox, “Add Headers to PDF Documents”, may appear on the screen. The
checkbox allows you to choose whether PDF documents will include header information
when they are displayed by the application. However, the “Include PDF Headers” box on
the Docket Report selection screen (whose default setting depends on that of “Add Headers
to PDF Documents”) will override your general header preference for that particular docket
report. "- If you click on Email information button, your e-mail address screen will be displayed. (See Step 4.)
- If you click on More user information button, your login/password screen will be displayed. (See Step 5.)
- Once all updates have been made, click on the Submit button to apply. (See Step 7.)
NOTE: You can update this screen as often as is needed to keep your information current. It is crucial that you always click on the Submit button as the last step to apply any changes!
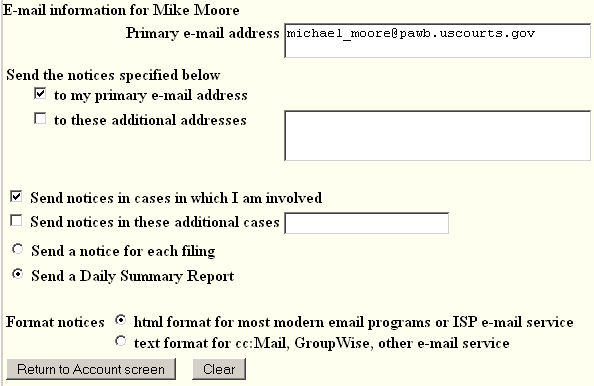
STEP 4 The Email information screen. (See Figure 4.)
NOTE: This Step is applicable to attorney logins only.
If you are a Limited Filing User, skip to Step 5 below!.
Figure 4.
- At a minimum, the following fields/boxes/buttons must be checked and/or entered:
- Primary e-mail address must be entered in the correct format
- The to my primary e-mail address box checked.
- The Send notices in cases in which I am involved box checked.
- The Send a Daily Summary Report button clicked.
- The html format for Netscape or ISP e-mail service button clicked.
- Other options include:
- The to these additional addresses box checked and one or more additional/secondary addresses entered. A copy of the notice will go to each address entered.
- The Send notices in these additional cases box checked and one or more case numbers entered in the box. These would be cases for which the attorney is not on the case, but still wishes to get electronic notice on the case. Their name would show up on the Notice of Electronic Filing screen under the section titled Notice will be electronically mailed to:.
- Click on Return to Account button to continue.
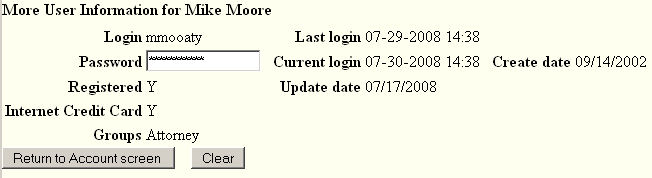
STEP 5 The More User Information screen. (See Figure 5.)
Figure 5
- Change your password by clicking in the box, deleting the astericks and then typing-in the new password.
- To leave this screen, click on the Return to Account screen button.
STEP 6 This will re-display the Maintain User Account Main Screen. (See Figure 3 above.)
- Now that all updates have been entered, click on the [Submit] button to save the information.
STEP 7 One of two secondary Update screens will appear.
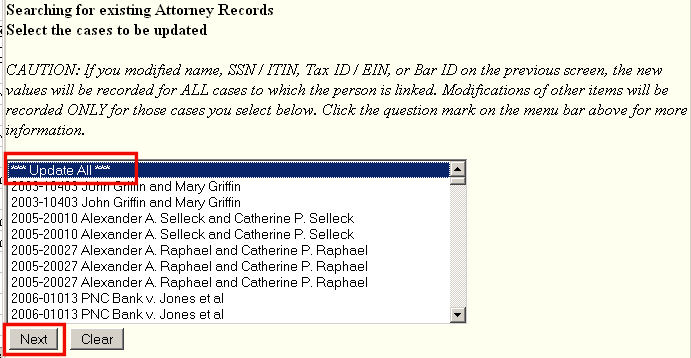
- The Major Information Update screen would appear if you had changed major data about yourself. (See Figure 7a.)
Figure 7a.
- This screen lists cases to which you are linked and you can determine if only some are to be updated. If you want just one case, scroll down to see it and click on it to highlight it. If you want more cases, hold down the Control key and click on the others, one at a time, to highlight them. If you want this new information to apply to all of the cases, click on ***Update All*** at the top of the list.
NOTE: In most instances, you would leave ***Update All*** selected.
- On this screen, click on the Submit button to complete the updating - then, skip to Step 8 below.
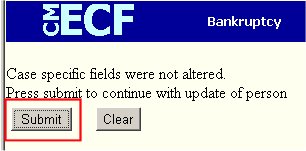
- The Minor Information Update screen would appear if no major changes made. (See Figure 7b.)
Figure 7b.
- Click on the Submit button to complete the updating.
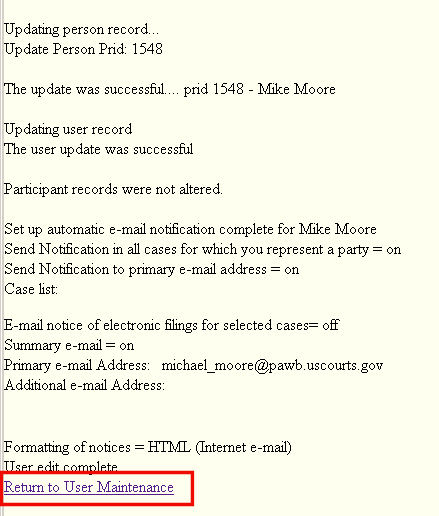
STEP 8 The Update was successful screen will appear. (See Figure 8.)
Figure 8.
- This screen indicates a successful update of your account information.
- What this screen actually displays is dependent upon what you changed.
- There will be at least two The (user) update was successful entries and possibly a third depending upon which, and how many, fields were changed.
- Notice the link to Return to User Maintenance at the bottom.
Return to the Topics in Alphabetical Order page.
Text Size: